


C240SH
| Series | All Products |
| Product Reference | C240SH |
| Description | 240x120x250cm |
| Weight | 23.00 kg |
| Manufacturer | RoyalRoom |
Shipping in 1-3 days (the nearest delivery date is 29.04) |
More info
Royalroom® are premium quality professional tents to grow plants indoors. Royalroom tents from High series are made from ecological thick material Mylar 600D, which reflect up to 95% of light. Thick material helps to prevents the penetration of odor as well as provides 100% light proofness. HIGH series main feature is increased highness (250cm) which allow grower to grow bigger plants and harvest more. Furthermore, you can wash your tent, in order to preserve the freshness of the grow environment. Metal 19mm frame, wide ceiling and reinforced steel connectors allow the hanging of heavy equipment like lights and ventilation system.
Vents
|
Material
Tent C240SH were made from very durable material Mylar 600D
Weight
C240SH tent has bearing capacity at 80kg
Zip
C240SH tent has strong and durable zip
Washing
The material used in the tent C240SH is 100% washable
Eco Material
Materiał użyty w namiocie C240SH The material used in the tent C240SH is 100% ECO hence is safe for plants and the environment.
High reflectivity of light
C240SH provides high (up to 95%) reflectiveness of the inner material
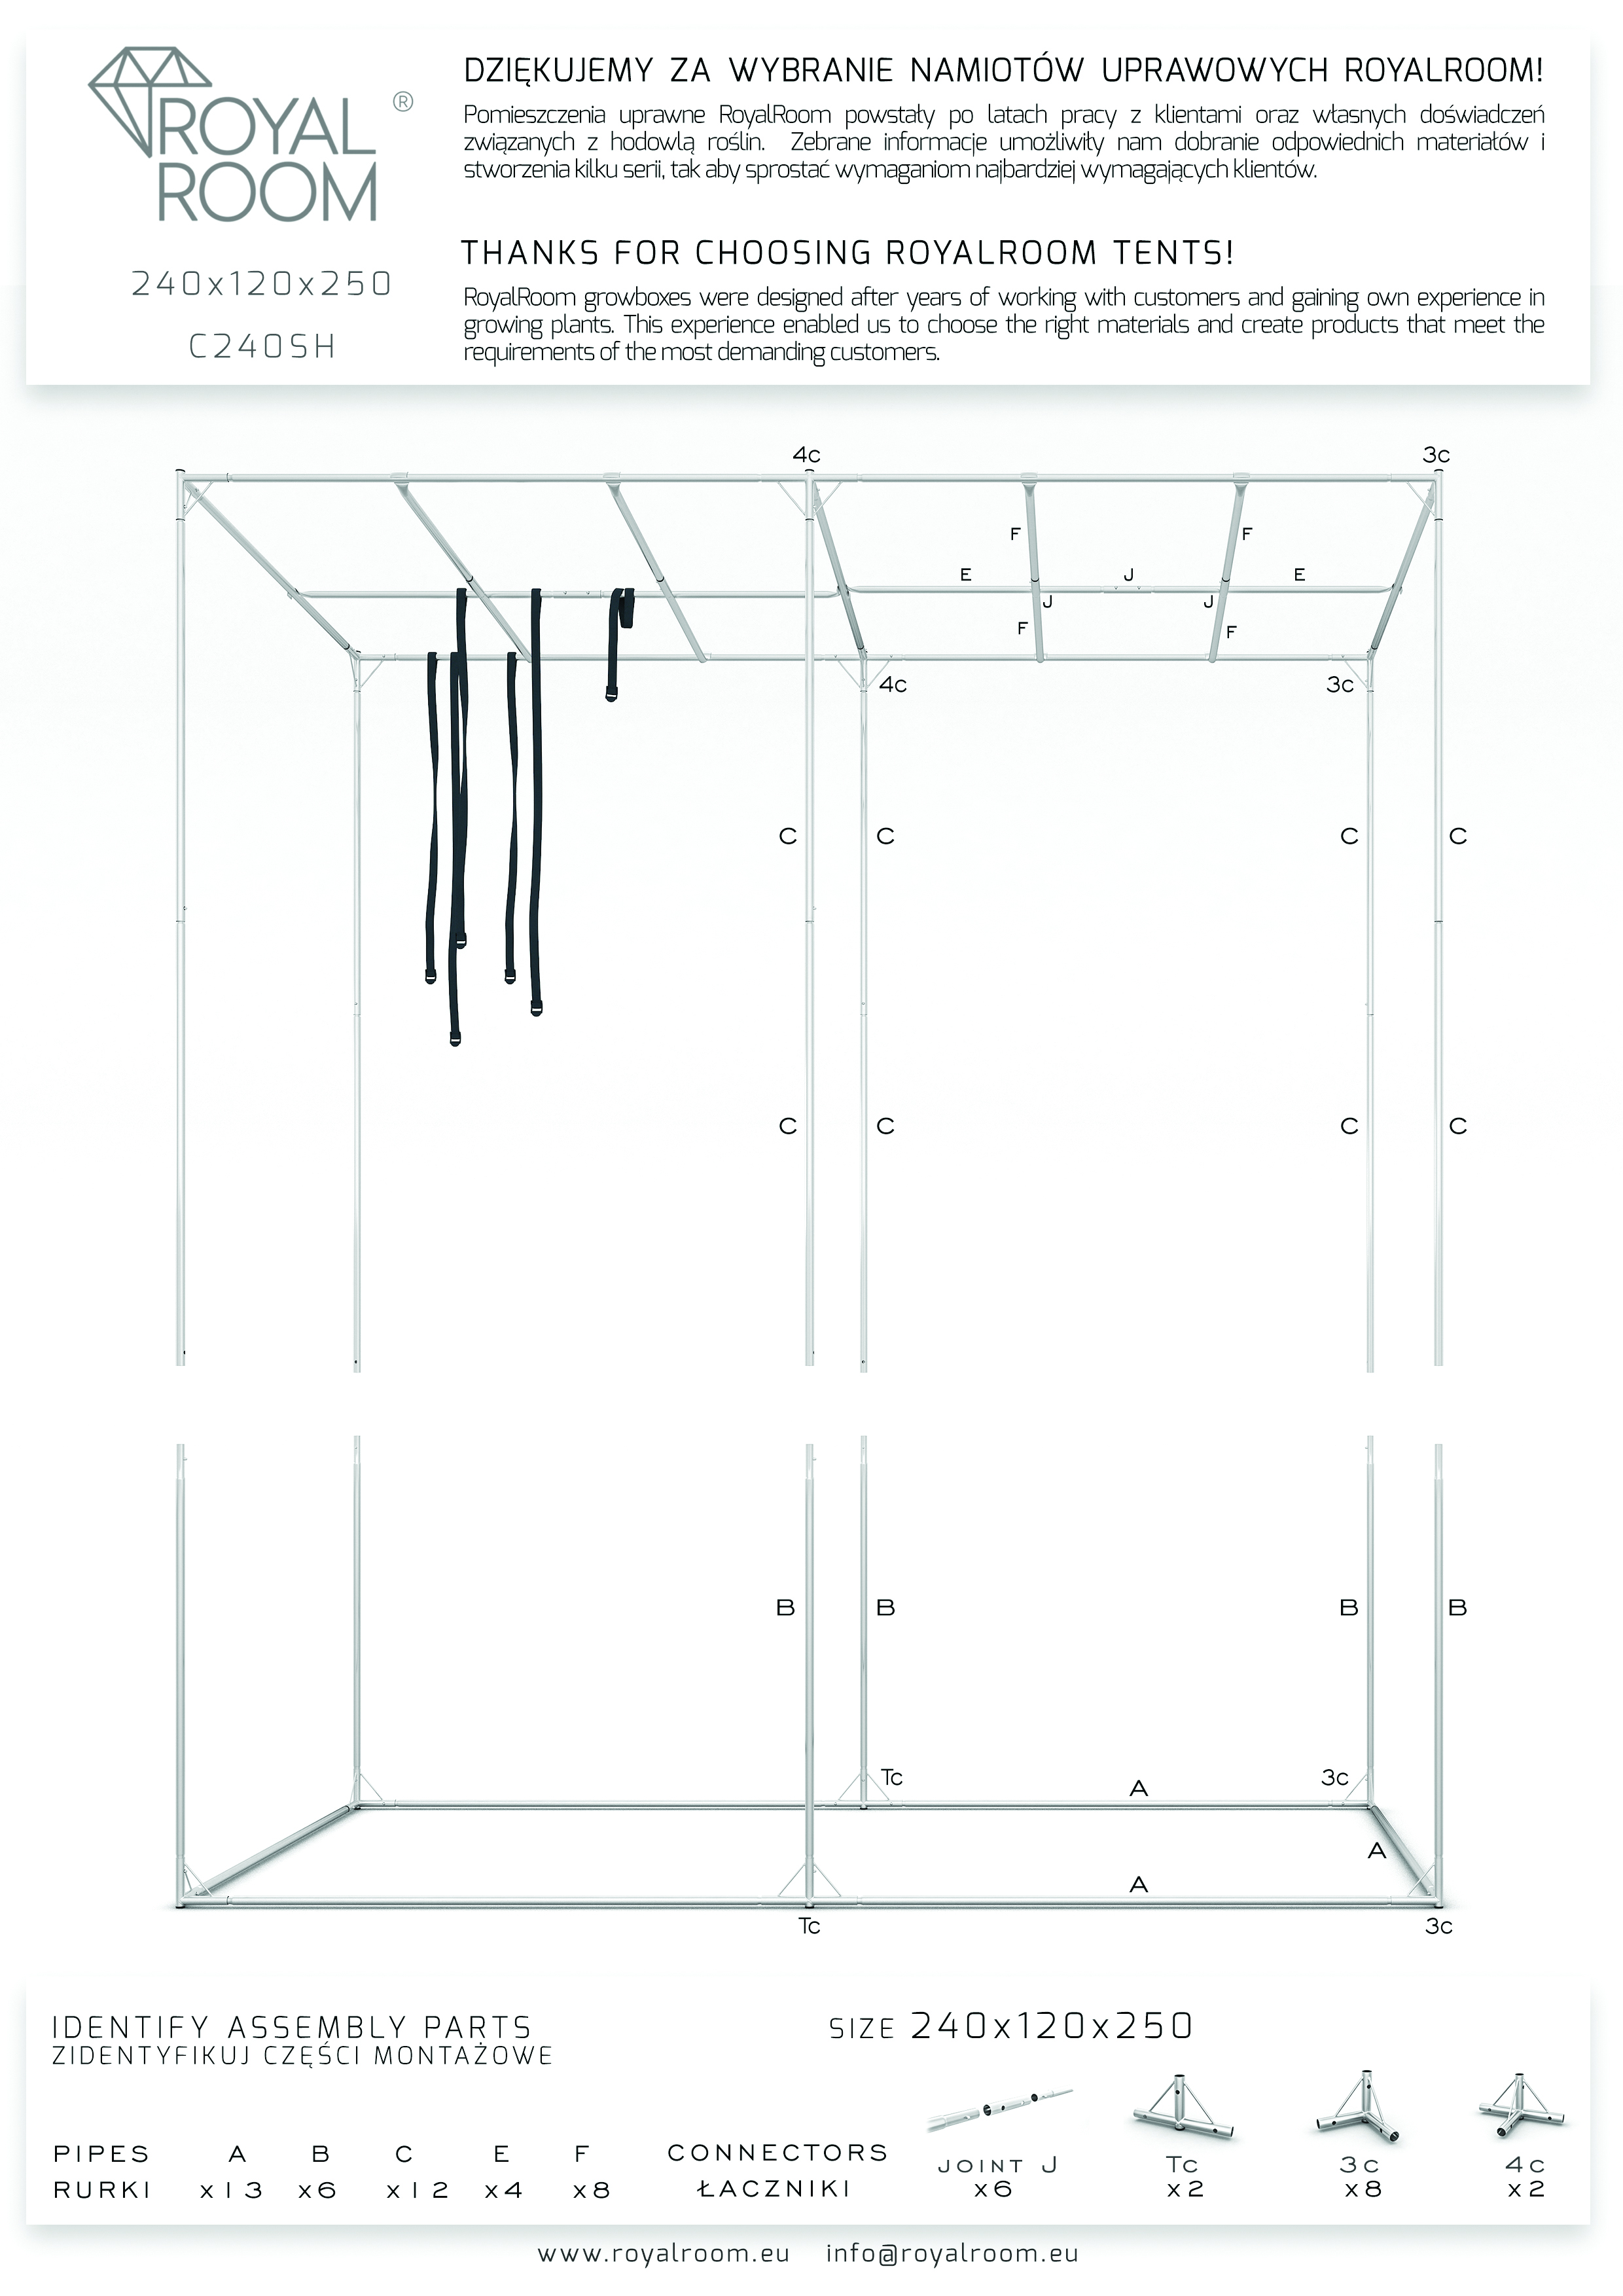
Assembling instruction:
Data sheet
| Height (cm) | 250 |
| Width (cm) | 240 |
| Depth (cm) | 120 |
| Material thickness (mm) | 600D |
| Tubes thickness (mm) | 19 |
| Volume (m³) | 7,2 |
| Surface area (m²) | 2,88 |
| Inputs number | 5 |
| Cross-ceiling number | 6 |
| Plants maximum capacity | 24 |
| Anzahl der Kartons | 1 |
Montage
Below you will find the graphic step-by-step instruction of assembling your Royalroom tent. Installation requires no tools and can be done by one person. You can assemble your grow room easily with minimum effort.


Fit the frame material
Prepare the material, open all side walls. Fit frame into the base of the tent.


